I made these little cuties the first time today, and wow, they were so easy! You'll notice that I got so excited by their appearance that I took nasty pictures of them, one of them showing the edge of the baking sheet. But that's no problem right? As long as they look cute and delicious who cares about the picture? Actually I do! Ah yes, again I had a hard time waiting for the tarts to cool down..torture I say!

Equipment:
- Kitchen Scale
- Measuring Spoons
- 10 Mini Tart Shells
- Oven
- Stove
- Food Processor (if you have one, else you can use your hands)
Ingredients:
- 180g of all-purpose flour
- 125g of cold unsalted butter (should absolutely be cold)
- cold water as needed, just a little bit, about 3-4 tablespoons
- 7-8 ripe bananas (medium-sized)
- 2 tbsp of sugar (make that 3 if you have a sweet tooth)
- Milk for glazing (for a vegan recipe use soy milk)
Method:
- If you are using a food processor, make sure that you place the bowl in the refrigerator atleast half an hour before.
- In the bowl of your food processor, process the flour and the butter until the mixture crumbles.
- Otherwise use your hand to mix the flour and the butter until it forms a crumbly mixture.

- Now, add the water, just a little bit of it, you don't want a too smooth dough. Mix until combined. Don't overwork the dough.
- Cover with cling film and refrigerate for 30-60 minutes.

- In the meanwhile, peel the bananas, mix in sugar and cook on high heat.
- Cook until just a little brown. Baking will continue the process of cooking the bananas.

- Remove from heat and set aside.

- At this point, remove the dough from the refrigerator and flatten to 1/4 inch thick with a rolling pin on a work surface.
- Using a cookie cutter or the rim of a glass, cut the dough to the desired diameter to line the tart shells. [I used a 3.6" diameter dish] Use a spatula to lift the dough if it sticks to the work surface.
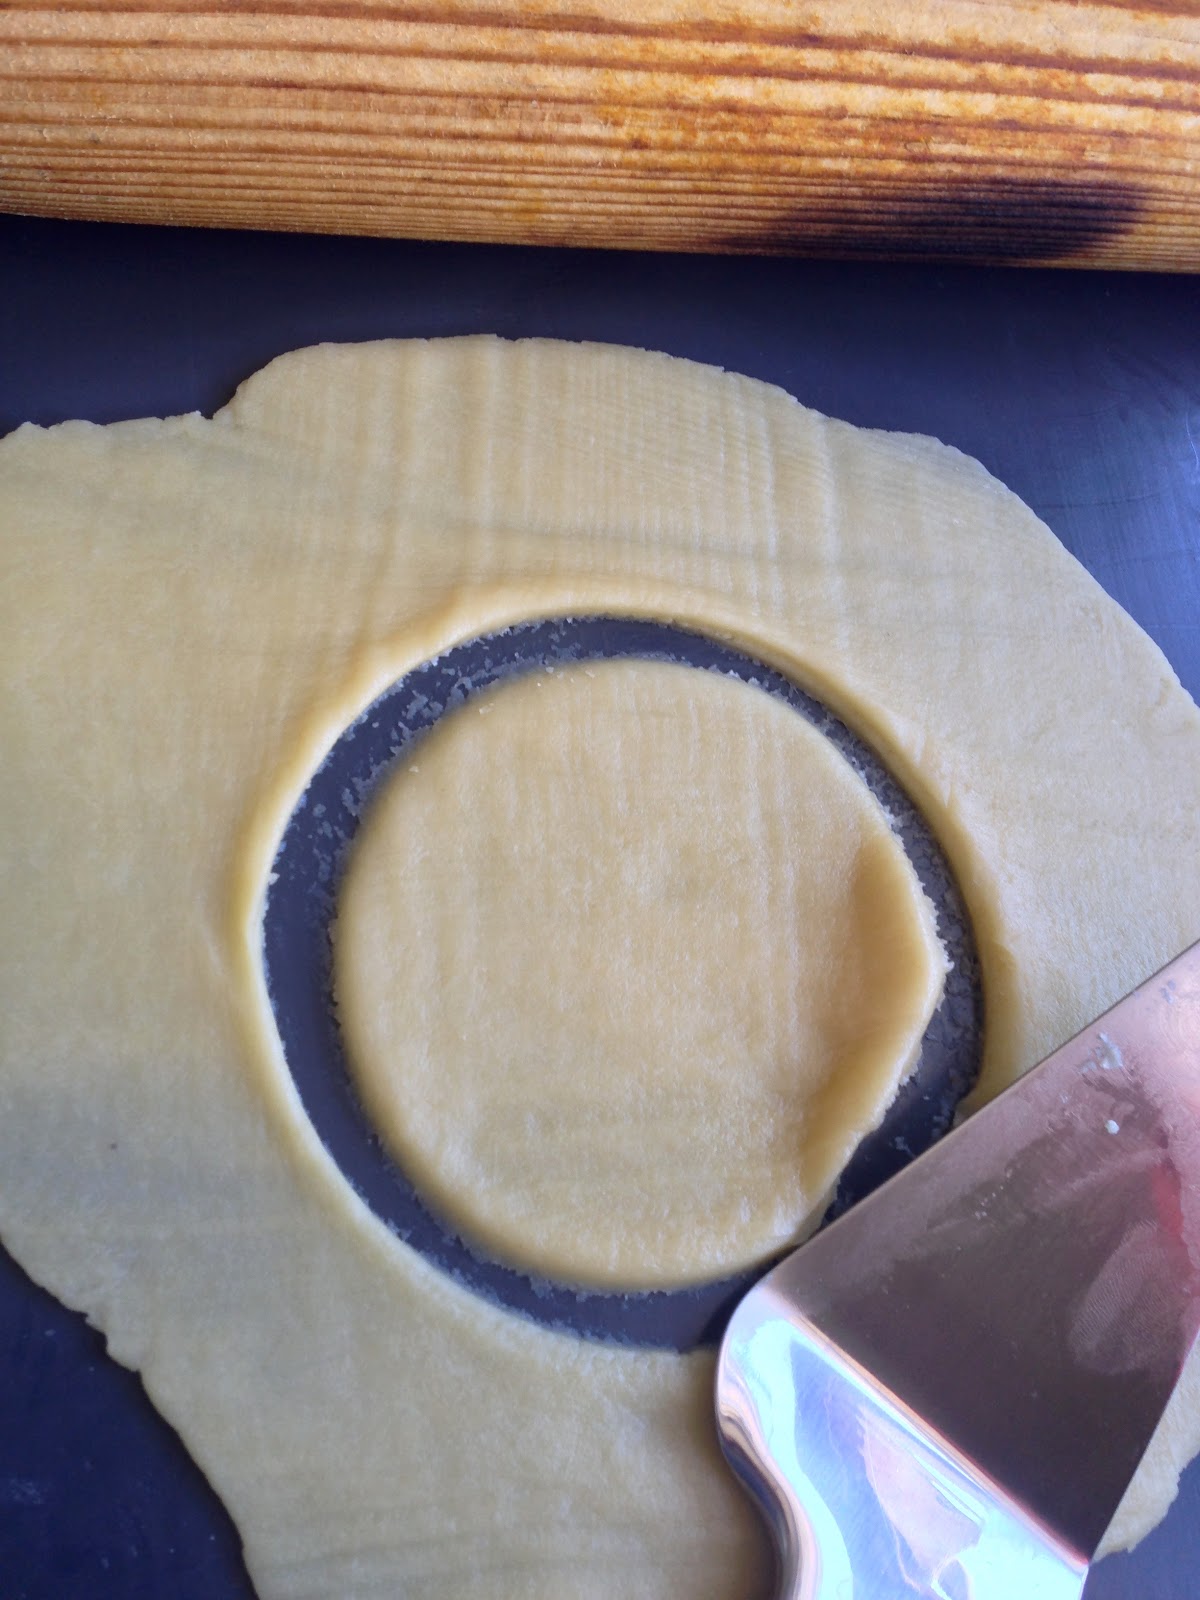
- Line the tart shells with the cut dough, gently press alongside the rim to cut off the excess dough.
- Repeat for the other tart shells.

- Preheat oven to 200˚C/392˚F.
- Butter the tart shells.
- You can now either fill the tart shells with 1 heaped tablespoon of the cooked bananas, or chill them for another 10-15 minutes [which I did] and then fill with the cooked bananas.

- At present, combine the remaining pastry and roll to 1/4 inch thick using a rolling pin.
- Using a knife cut the uneven sides, the remaining dough will be rectangular in shape.
- Then use your knife to cut the dough lengthwise, the width of the strips should be around 1 cm.

- Either make a lattice like I have or just cover with the strips however you like it.
- Glaze with milk.

- Cook for 20-30 minutes or until golden brown. [Baking time will depend on the thickness of your dough]


Happy Eating!
Tip:
- If you're making a larger banana tart, using say a 8" pan, to make the lattice, you can press a cooling rack onto the dough to make even sized strips for the lattice.
- To make the lattice, I've used 7 strips per tart shell, you might use 8 or more. Or even less.
- Start by placing 4 lattice vertically, or that could be 3 vertical and then 4 horizontal. But in the photo it's 4 vertical so Im gonna go with that. Carefully press the 4 vertical strips' one end firmly. Remove the excess. And let the other ends overhang.
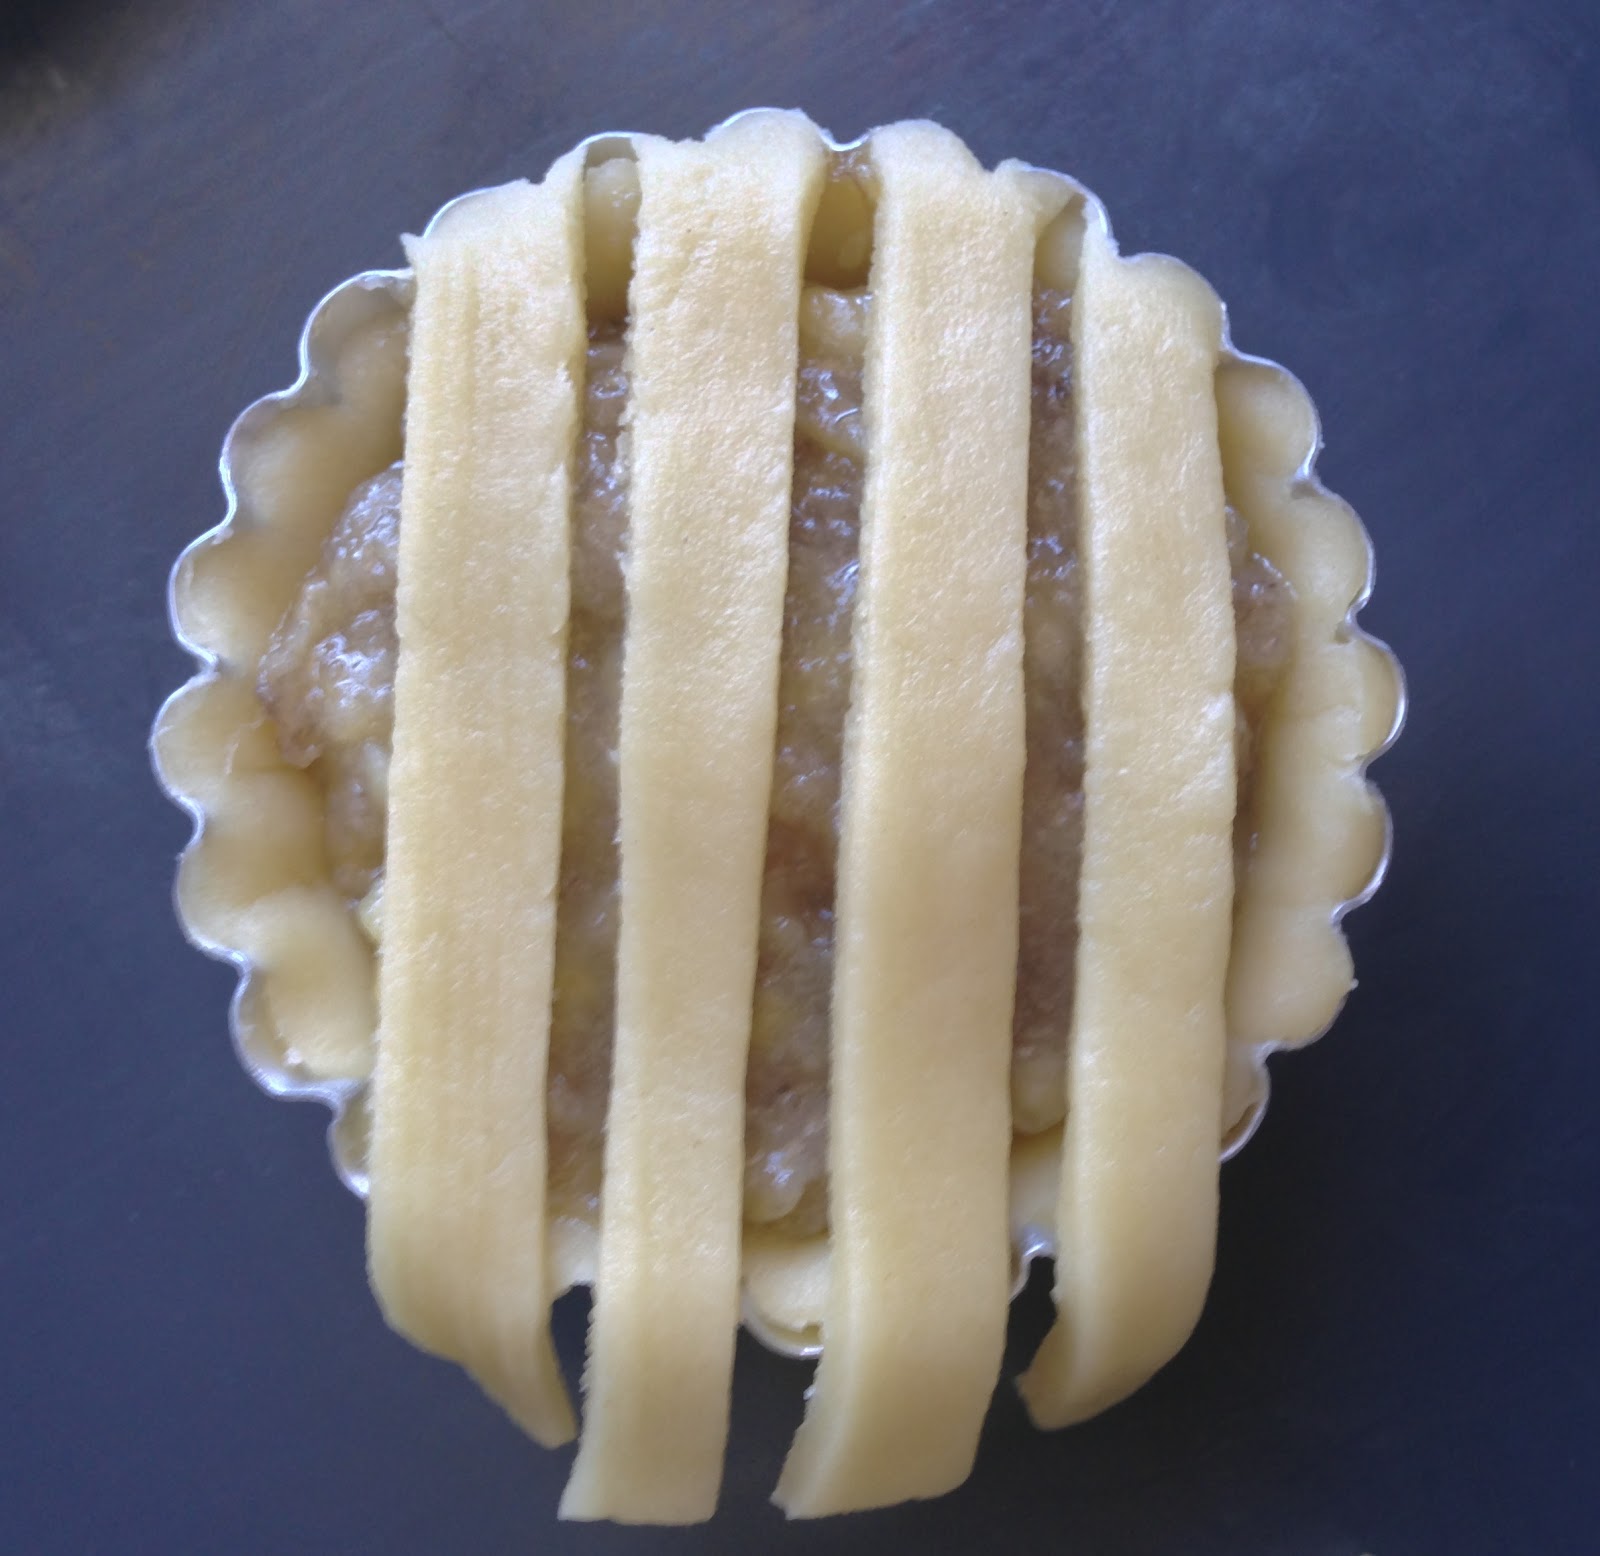
- Place 1 latice horizontal just like in the photo below.

- I find it easier to let it overlap the 1st vertical strip (starting from right). Then I let it pass under the second strip. Of course you will have to lift every other strip for that.

- Now, let the strip overlap the 3rd vertical strip and let it pass under the last vertical one. Fix the end by pressing firmly onto the edge of the tart shell. Remove the excess.

- Place a 2nd horizontal strip. At this point you want it to pass under the 1st vertical strip and over the 2nd vertical one.

- Repeat with another horizontal strip and drumrolls, you're done!


I will have to try this. I love making pastries <3
ReplyDeleteDo try it and give me your thoughts! And thankyou for commenting Christina, this is my first comment and it means a lot to me!
DeleteHappy baking!
OMG. .Since the time i've been waiting for this recipe. .I can't believe i just found it. .Off to the supermarket i go. .Getting some bananas. .I'm going to make banana tarts today.. Yay.. !! Hello cuties. .I shall see you lil nasty tarts soon. .Thanks for the recipe!
ReplyDeleteOMG. . Since the time i've been waiting for this recipe, i can't believe i finally found it.. Off to supermarket i go..Getting some bananas to make my ever favourite banana tarts. .God i miss these nasty lil cuties. .hello tarts .. here i come..Thanks a million for the recipe dear. .Holy Jesus. .Am making tarts today!! Yay. .
ReplyDeleteHey Yashu! Im glad you found this recipe! All the pleasure's mine and do let us know your feedback!
ReplyDeleteHappy Baking ;)
My wife did that today. It was superb. Thank you so much
ReplyDeleteThanks loads... It's better to cook at home rather buying one piece for £2.50..thanks loads :*
ReplyDeleteHi, I've been trying to make tarte banane for a while. I live in Canada and we have nothing in grams here only ml, oz and cups. Is there any way I could get a different measurement i'd really appreciate it :) Thanks
ReplyDeleteThank you so much for this wonderful recipe
ReplyDeleteTried it...yummy..kiddos loved it..thank you..waiting for more recipes
ReplyDeleteI am glad the kiddos liked it! I will be back from a long rest soon with more easy but yummy recipes :)
Delete